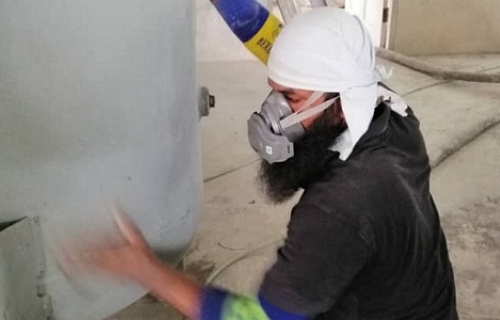
Chemical Cleaning

Here’s a general overview of the process:
1. Safety Precautions: Before starting any cleaning procedure, ensure you follow all safety guidelines. Wear appropriate protective gear, including gloves, goggles, and a respirator if required. Ventilate the area adequately to prevent the accumulation of harmful fumes.
2. Tank Preparation: Shut down the air compressor and release all pressure from the tank. Close all valves and disconnect any external connections. Ensure the tank is completely isolated from the compressed air system.
3. Drainage: Open the drain valve to release any accumulated water, oil, or other liquids from the tank. Dispose of these fluids according to local regulations.
4. Chemical Solution Preparation: Prepare a suitable chemical cleaning solution. The specific solution may vary based on the type of contaminants present, but a common option is a mixture of water and a commercial cleaning agent or detergent. Follow the manufacturer’s instructions for the proper dilution ratio.
5. Circulation: Fill the tank with the cleaning solution and circulate it throughout the tank. You can use a pump or the compressor itself to circulate the solution. Ensure the solution reaches all areas of the tank, including baffles and corners.
6. Soaking: Allow the cleaning solution to soak in the tank for a sufficient period, typically around 2-4 hours. This allows the chemicals to break down deposits and loosen contaminants.
7. Agitation: If necessary, use mechanical or manual means to agitate the solution inside the tank. This helps dislodge stubborn deposits and facilitate the cleaning process. Be cautious not to damage the tank’s internal surfaces.
8. Draining and Flushing: After the soaking period, drain the cleaning solution from the tank. Flush the tank thoroughly with clean water to remove any residual chemicals or loosened debris. Repeat this step as necessary until the water runs clear.
9. Drying: Allow the tank to dry completely before reconnecting it to the compressed air system. Proper drying helps prevent the formation of new deposits or corrosion.
10. Inspection and Maintenance: Once the tank is dry, inspect its internal surfaces for any remaining deposits or signs of damage. If necessary, perform additional cleaning or maintenance tasks to ensure optimal performance.
It’s essential to consult the manufacturer’s guidelines and consider specific requirements for your air receiver tank. Additionally, it may be beneficial to involve a professional service or consult with experts experienced in chemical cleaning of air receiver tanks to ensure proper cleaning and safety protocols are followed.
Maximize Energy, Minimize Cost!
All your profit goes into electricity bill? Especially ICPT? Talk to us and let us help you.
AIRNERGY SDN BHD
Headquarter:
18, Jalan Anggerik Mokara 31/46, Kota Kemuning Seksyen 31
40460 Shah Alam, Selangor
Sabah Branch:
Tingkat Bawah Lot 4, Blok 5 Bandar Karamunting
Jalan Karamunting, 90000 Sandakan
Phone: +603-5892 2948
Email: info@airnergy.com.my


